What matters most
- Use additive parts to learn while geometry is changing; avoid committing production steel too early.
- Compare actual grade availability, anisotropy, surface, conditioning, and service behavior.
- Build a current cost model using quantities, revisions, tooling, inspection, and secondary operations.
Choose the process around the current program stage
Evaluate the technical choice together with part requirements, tooling consequences, production controls, and the evidence required for approval.
Design maturity
Use additive parts to learn while geometry is changing; avoid committing production steel too early.
Material
Compare actual grade availability, anisotropy, surface, conditioning, and service behavior.
Demand
Build a current cost model using quantities, revisions, tooling, inspection, and secondary operations.
Validation
Do not assume a printed prototype predicts molded dimensions, texture, weld lines, or long-term behavior.
Technical guide
The sections below retain the detailed design, tooling, process, and quality context needed to evaluate this topic beyond the summary.
Key Takeaways
- 1 Below 500 units, 3D printing typically wins on total cost — no tooling means per-unit costs of $17–$30 for SLS/MJF vs $96 for single-cavity injection molding at 100 parts.
- 2 Above 5,000 units, injection molding wins decisively — at 10,000 parts, injection molding costs ~$0.99/part vs $7.00/part for 3D printing, a 7× cost advantage.
- 3 Material requirements, surface finish class, and dimensional tolerances all shift the crossover point — engineering resins and Class A surfaces favor injection molding at lower volumes than commodity applications.
- 4 The global injection molding market reached USD 335 billion in 2025 at 5.8% CAGR — driven by automotive, medical, and electronics sectors where additive manufacturing cannot match volume economics.
The Real Question Engineers Are Asking
You have a validated design and an order for 10,000 units due in Q3. Your team has been printing prototypes on an FDM machine for six months. The question on every product manager’s whiteboard is: is it time to cut a mold, or can we scale up additive?
The answer is not about which process is “better” — both are legitimate production methods for the right application. The answer is about economics, material requirements, and the specific constraints of your program. This guide gives engineers the data to make that decision correctly, before committing capital to either tooling or additive capacity.
The injection molding market reached USD 335 billion globally in 2025, growing at 5.8% CAGR through 2035. That growth is driven by automotive, medical device, and electronics manufacturers who have run exactly this calculation — and found that at production volumes, additive manufacturing cannot match the per-unit economics of a properly specified injection mold.
Process Fundamentals: What Each Method Actually Does
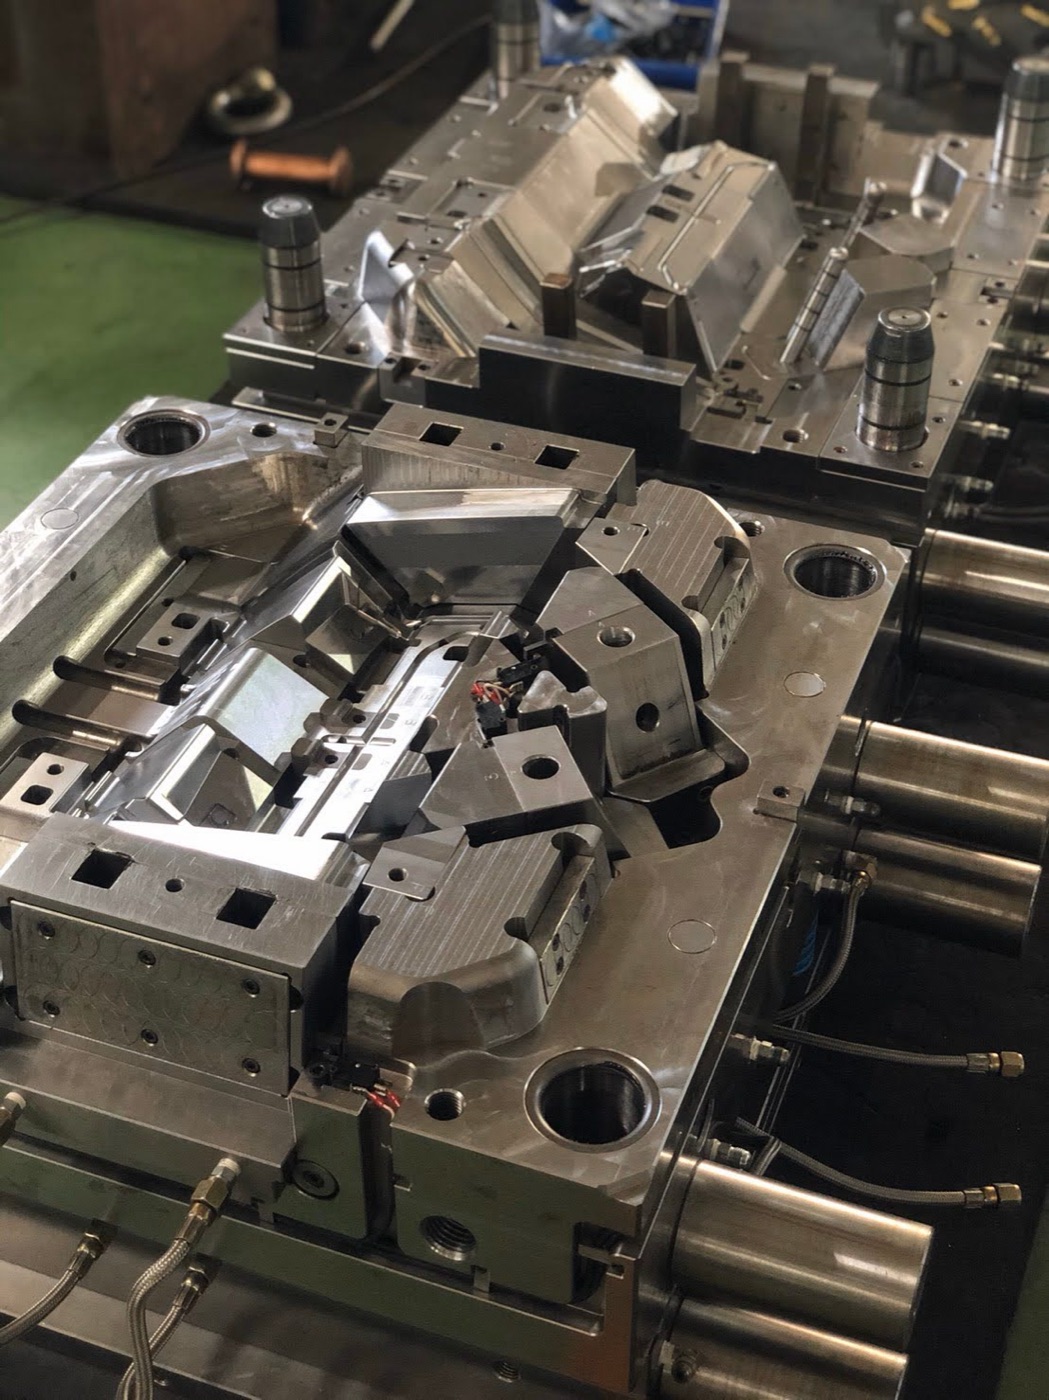
Injection molding forces molten thermoplastic into a precision-machined steel or aluminum mold cavity under pressures of 10,000–30,000 psi. Once cooled, the part is ejected and the cycle repeats — typically in 15–60 seconds. The mold is the major cost center ($3,000–$100,000+), while marginal shot cost drops to cents at high volume. The process delivers consistent geometry, tight tolerances (±0.05–0.1 mm standard), and the full range of engineering thermoplastics including PEEK, POM, LCP, and glass-filled nylons.
3D printing (additive manufacturing) builds parts layer by layer from a digital file — no tooling required. The main variants relevant to production are FDM (lowest cost), SLA (highest surface detail), SLS (best functional properties), and MJF (HP’s production-optimized process). Each printed part incurs approximately the same machine time and material cost, so total spend scales linearly with volume. This structural difference — injection molding’s fixed tooling plus near-zero marginal cost vs additive’s zero tooling but constant per-part cost — is the entire basis for the break-even analysis below.
The Break-Even Analysis: Where the Crossover Happens
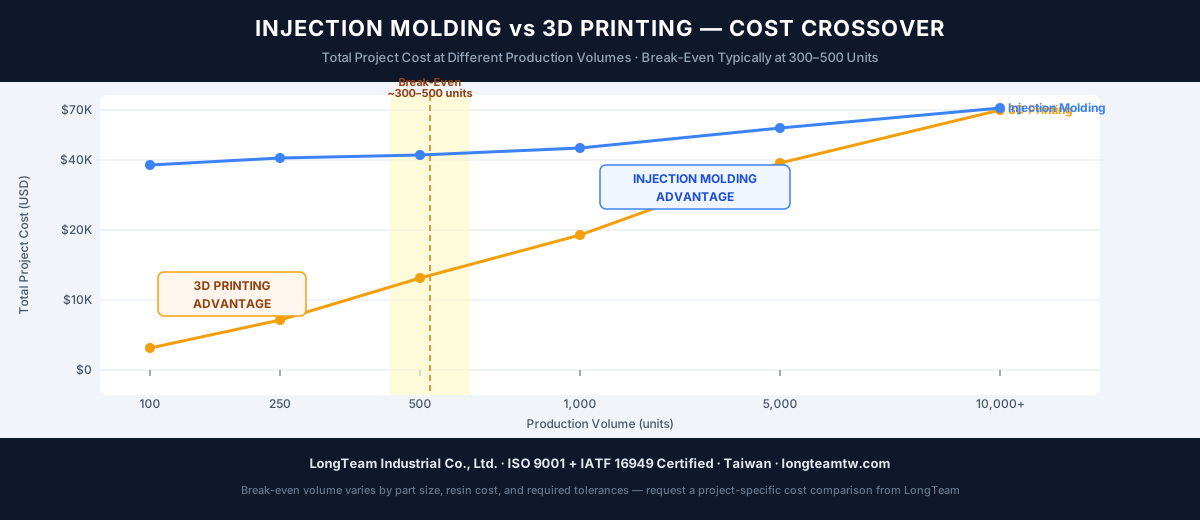
The crossover point shifts with mold complexity, part size, and the 3D printing process being compared. The table below uses data from Fictiv’s cost analysis and HLH Rapid’s cost study for a typical mid-size ABS/PA part with a $5,000 single-cavity mold:
| Volume | SLS 3D Printing (total) | Injection Molding (incl. tooling) | Lower Cost |
|---|---|---|---|
| 100 units | ~$1,700 ($17/part) | ~$9,600 ($96/part) | 3D Printing |
| 500 units | ~$8,500 ($17/part) | ~$7,500 ($15/part) | Injection Molding |
| 1,000 units | ~$23,000 ($23/part) | ~$10,000 ($10/part) | Injection Molding |
| 5,000 units | ~$25,000 ($5/part) | ~$12,000 ($2.40/part) | Injection Molding |
| 10,000 units | ~$70,000 ($7/part) | ~$12,900 ($0.99/part) | Injection Molding (7× cheaper) |
A simple part with a $3,000 aluminum mold can cross over as low as 200–300 units. A complex multi-cavity steel tool at $50,000+ may not cross over until 8,000–10,000 units. The single most effective way to lower your crossover volume is reducing mold complexity through DFM — fewer side actions, simpler parting lines, and optimized wall geometry all reduce tooling cost and accelerate the point at which injection molding becomes economical.
Material Capabilities, Tolerances & Surface Finish
Unit cost is not the only variable. Many applications cannot use 3D printing at any production volume because of material or quality requirements that additive processes cannot meet. The comparison below draws on specifications from Protolabs and Xometry’s process comparison:
| Attribute | Injection Molding | FDM 3D Printing | SLS/MJF 3D Printing |
|---|---|---|---|
| Dimensional tolerance | ±0.05–0.1 mm | ±0.3–0.5 mm | ±0.2–0.3 mm |
| Surface finish (Ra) | 0.4–1.6 μm (Class A possible) | 3.2–12.5 μm (visible layers) | 6.3–12.5 μm (grainy) |
| Available resins | 100+ incl. PEEK, POM, LCP, glass-filled grades | ~30 FDM-compatible filaments | PA12, PA11, TPU, limited range |
| Strength isotropy | Uniform (isotropic) | Weaker Z-axis (anisotropic) | Near-isotropic |
| Part-to-part consistency | Cpk > 1.67 achievable under SPC | Variable (layer adhesion) | Good but not SPC-controlled |
| Typical tooling lead time | 4–10 weeks (steel mold) | None — parts in 24–72 hrs | None — parts in 3–5 days |
For automotive connectors requiring IATF 16949-compliant Cpk > 1.67 on critical dimensions, or medical device components requiring validated process parameters under ISO 13485, injection molding is the only viable process regardless of volume. No SLS or FDM production environment currently delivers the statistical process control required for these regulated applications.
When to Switch: A Practical Decision Framework
The indicators below are compiled from engineering guides published by Uptive Manufacturing and Fictiv’s 2025 molding trends report:
Switch to injection molding when:
- Annual volume exceeds 500–1,000 units and will hold at that level for 2+ years
- The material is not available in printable form (e.g., POM acetal, glass-filled nylon, TPE overmold)
- Surface finish requires Class A appearance or Ra < 1.6 μm
- Critical tolerances are tighter than ±0.2 mm
- The supply chain requires an IATF 16949 or ISO 13485-certified supplier with documented Cpk
- Part-to-part consistency is a safety or functional requirement, not cosmetic
Stay with 3D printing when:
- Volume is below 300 units and the design is still evolving
- Geometry is too complex to mold without expensive side actions that widen the cost crossover
- You need functional parts within 48–72 hours for fit and function testing
- The application tolerates ±0.3 mm variation and a machined or sanded surface finish
The most efficient transition strategy is to design for moldability from the very first prototype — even when planning to print early-stage units. A DFM review of your 3D-printed prototype geometry identifies side-action requirements, wall thickness issues, and parting line strategy before any steel is cut. When you reach your volume crossover, the mold can be built directly from the existing design without a costly geometry overhaul.
Ready to Transition from Prototyping to Production?
LongTeam Industrial supports international OEM programs with integrated tooling and injection molding. Share your prototype geometry so the team can confirm the moldability-review scope, tooling options, and quotation timing for your program.
Contact LongTeam →What to confirm before supplier review
Use the drawing, material specification, expected demand, application conditions, and acceptance requirements to turn a general process discussion into a program-specific review.
- Is the geometry stable enough for tooling?
- Must prototypes use production-equivalent material and process?
- What demand scenarios should the cost model include?
- Which tests must be repeated on molded parts?
Continue the engineering review
Use the related guides and capability pages to connect this topic to part geometry, tooling, molding, and qualification decisions.